Fear not! in this article, we will guide you through the intricate steps and insider tips that will transform you into an omelette aficionado. Whether you are preparing a leisurely brunch for friends or a fast breakfast for yourself, mastering the perfect French omelette will not only elevate your culinary skills but also bring joy to your dining table. So, let’s crack some eggs and start on the path to achieving omelette perfection—soft, fluffy, and irresistibly delicious, time after time.
The Art of Whisking: Techniques for Achieving the Ideal Egg Mixture
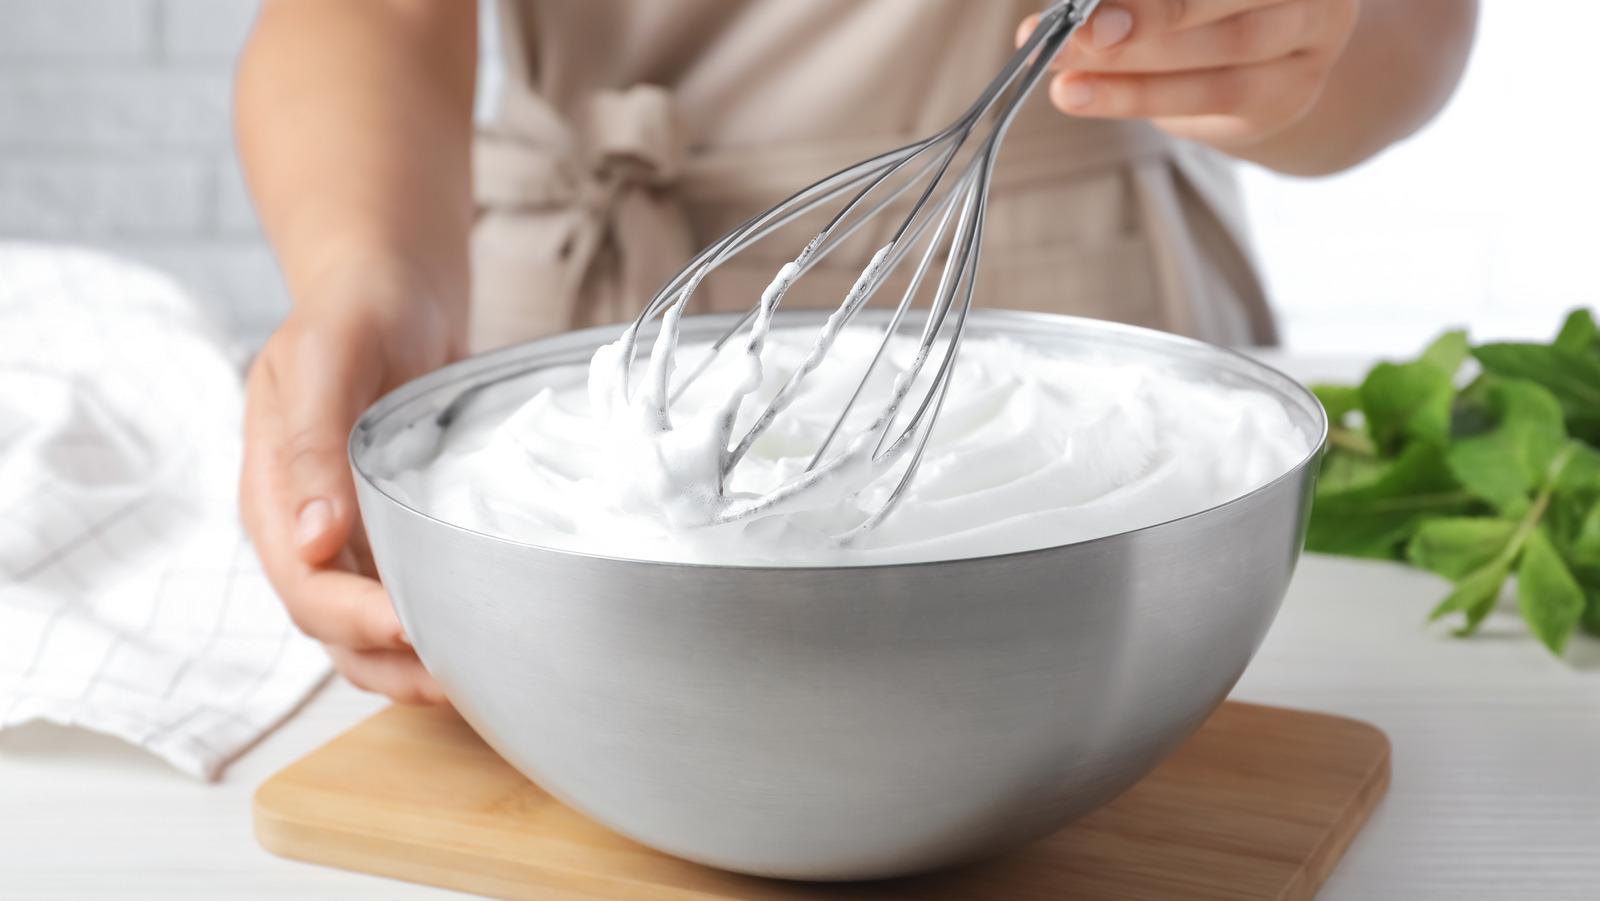
Whisking is an essential skill in the culinary world, especially when it comes to creating that soft and fluffy texture in a French omelette. The technique you use can greatly influence the final outcome,so it’s significant to understand the nuances. Start with room temperature eggs as they incorporate air more effectively. Using a whisk—whether it’s a traditional wire whisk or an electric mixer—will make a noticeable difference, enabling you to achieve the desired volume and consistency. As you whisk, focus on the following:
- speed: Whisk rapidly but gently to avoid splattering.
- Angle: Hold the whisk at a slight angle to your bowl, which allows for more efficient incorporation of air.
- Technique: Use a circular motion combined with an up-and-down flick to ensure even mixing.
Once your eggs have reached a pale and frothy state, you’re ready to season and add any extras. For a harmonious blend, it’s crucial to introduce salt just before cooking; this not only enhances flavor but also helps maintain the structure of the eggs. For those interested in elevating their omelette game, consider the following flavor-building techniques:
| Technique | description |
|---|---|
| Infusing Herbs | Add finely chopped fresh herbs like chives or parsley for an aromatic touch. |
| Adding cheese | mix in a bit of your favorite cheese for creaminess—try goat cheese or Gruyère. |
| Chopping Vegetables | Incorporate finely diced bell peppers or tomatoes for a vibrant flavor profile. |

Choosing the Right Pan: Tools and materials for Optimal Results
when it comes to whipping up a perfect French omelette, the choice of pan is paramount. A high-quality, non-stick skillet is often recommended for achieving that soft, fluffy texture. Look for options made from materials that conduct heat evenly, ensuring that your eggs cook uniformly without burning. Additionally, a pan with flared edges allows for easy flipping and folding, an essential technique in omelette readiness. Consider these important features when selecting your cookware:
- Material: Copper, stainless steel, or high-grade non-stick surfaces.
- Size: A 8 to 10-inch skillet is ideal for a classic French omelette.
- Weight: A heavier pan assures better heat retention and even cooking.
- Handle: A agreeable, heat-resistant handle for easy maneuvering.
Furthermore,using the right tools complements your choice of pan. An excellent whisk or fork for beating the eggs vigorously is essential to incorporate air, granting your omelette its signature fluffiness. A rubber spatula will assist in gently pushing the edges toward the center while allowing the uncooked eggs to reach the hot surface of the pan. Here’s a quick overview of essential tools:
| Tool | Purpose |
|---|---|
| Whisk | Incorporates air into eggs for fluffiness. |
| Rubber Spatula | Gently folds and serves the omelette. |
| mixing bowl | Holds beaten eggs until ready. |
Cooking Temperature: Mastering the Heat for Perfect Softness
The secret to achieving that coveted softness in your French omelette lies primarily in mastering the cooking temperature. Heat control is crucial; you want to strike a balance between too high and too low. Start by preheating your non-stick skillet over medium-low heat. This gentle temperature allows the eggs to cook evenly,preventing them from toughening or browning too much. For the perfect texture, consider using medium-low heat for a longer duration rather than high heat that can quickly dry out the eggs.
When the skillet is lightly heated, add your beaten eggs mixed with a splash of cream or milk for added richness and extra softness. As the eggs begin to set, use a spatula to gently push the cooked edges towards the center while tilting the pan to let the uncooked egg flow to the edges. This technique ensures an even cook throughout. To help visualize this process, refer to the table below detailing the cooking times and techniques for different heat levels:
| heat Level | Cooking Time | Texture Outcome |
|---|---|---|
| Low | 5-6 minutes | Super soft, creamy |
| Medium-Low | 3-4 minutes | Fluffy, slightly firmer |
| Medium | 2-3 minutes | Overcooked, dry spots |
By maintaining a consistent level of heat and being attentive to the cooking time, you’ll find that your French omelette transformations into a soft, delicate cloud of egg, ready for your favorite fillings or simply seasoned with salt and pepper. Remember, practice makes perfect, so don’t hesitate to experiment with slight adjustments to find your ideal cooking temperature!
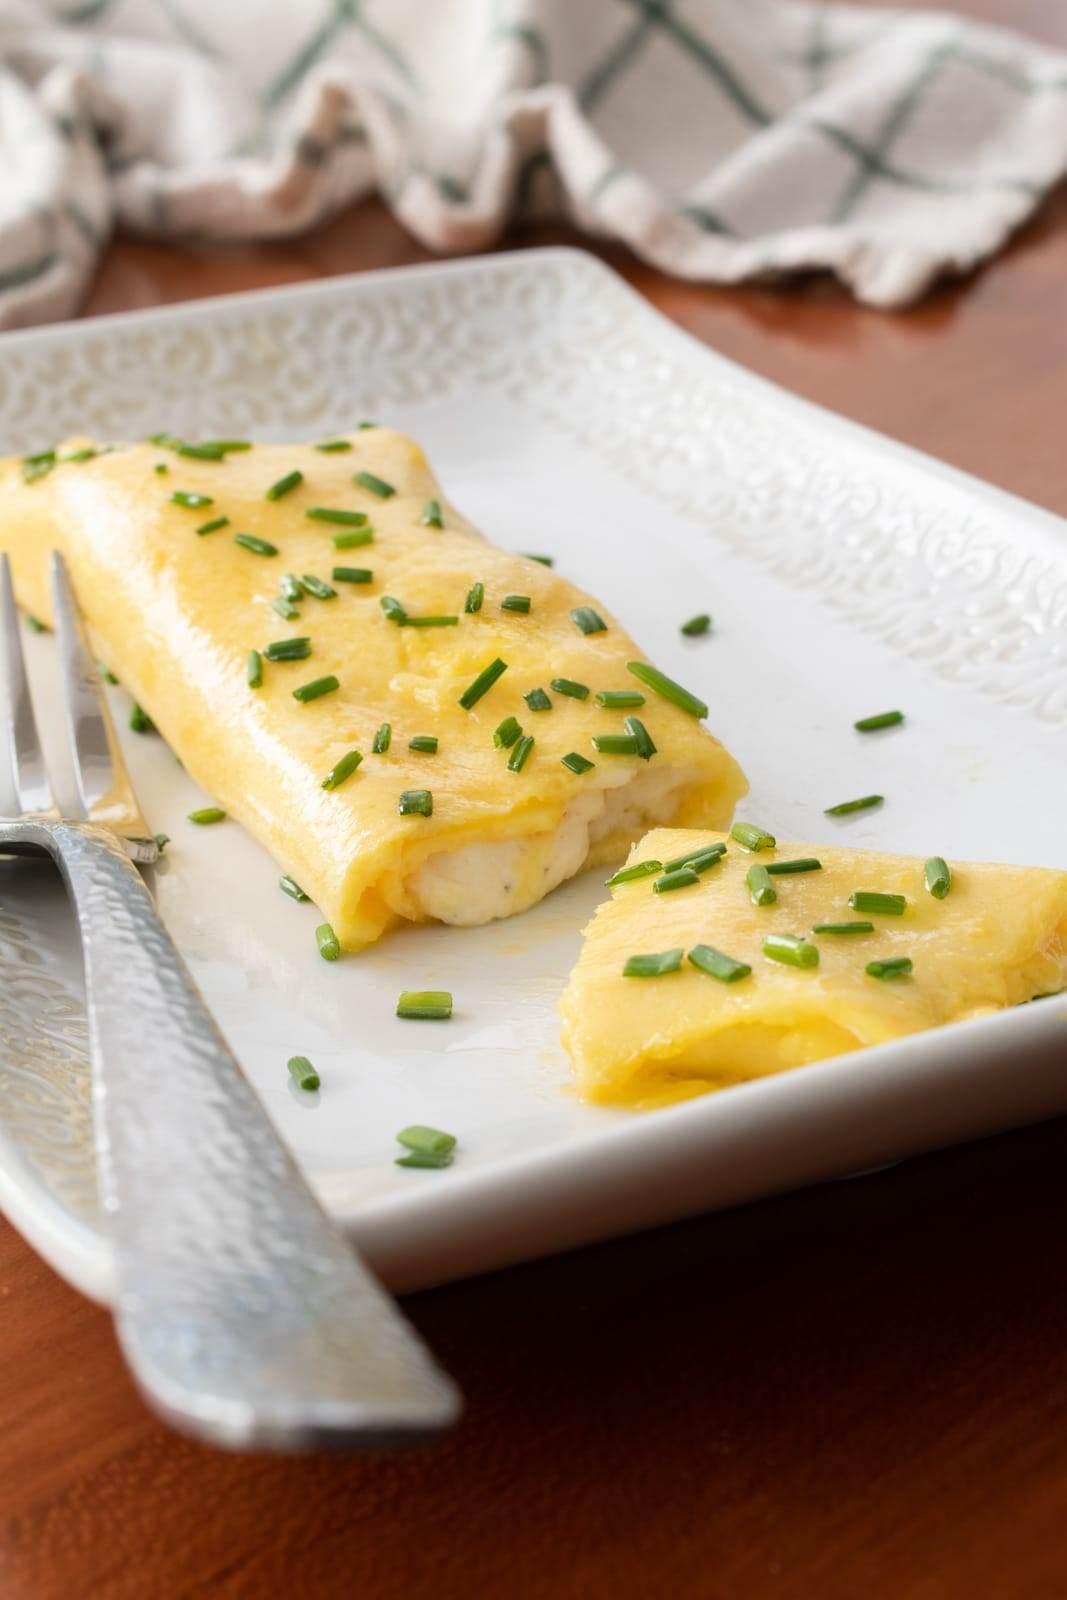
Folding and Finishing: Elevating Your Omelette Presentation and Flavor
To create an omelette that not only tantalizes the taste buds but also dazzles the eyes, the folding and finishing techniques are crucial. After achieving the perfect level of fluffiness, it’s time to bring your culinary vision to life. carefully fold the omelette in half,allowing the creamy center to remain exposed for a seductive appeal. A gentle flick of the wrist will help to maintain its delicate structure. For a finishing touch that enhances both flavor and presentation, consider these options:
- Herb Garnish: Fresh herbs like chives or parsley contribute vibrant color and freshness.
- Cheese Dusting: A light sprinkle of finely grated cheese can add depth and richness.
- Microgreens: These add a modern twist and contrast beautifully with the yellow hue of the omelette.
Don’t underestimate the power of a thoughtful garnish. A simple technique to elevate the visual appeal is to use a small ring mold while plating. Pour your omelette into the mold, allowing it to take on an elegant shape as it rests.Enhance this further by crafting a flavorful sauce or drizzle on the plate. Consider these options for a complementary sauce or drizzle:
| sauce/Drizzle | Flavor Profile |
|---|---|
| Herb Sauce | Radiant and fresh |
| Hollandaise | Creamy and rich |
| Tomato Coulis | Sweet and tangy |
In Summary
mastering the art of the perfect French omelette is not merely about the ingredients or the technique; it is a delightful journey that invites you to embrace the elegance of simplicity. With practice,patience,and a dash of passion,you’ll soon find yourself flipping those golden folds with confidence,transforming a humble meal into a culinary masterpiece.Whether you prefer it plain or embellished with herbs and cheese, each omelette offers a canvas for your creativity. So gather your eggs, heat your pan, and let the conversion begin, one fluffy layer at a time. bon appétit!